How do I split a Zendesk ticket into separately assignable subtickets?
From any ticket, open the Tasks and Subtickets app, click the three dot menu next to a task, choose Convert to new ticket, and fill in the details. Each subticket is a real Zendesk ticket you can assign to another team, linked back to the parent. To make it repeatable, apply a ticket template automatically from a task list.
How to do it with Tasks and Subtickets
- On a ticket, open the Tasks and Subtickets app to see and add tasks.
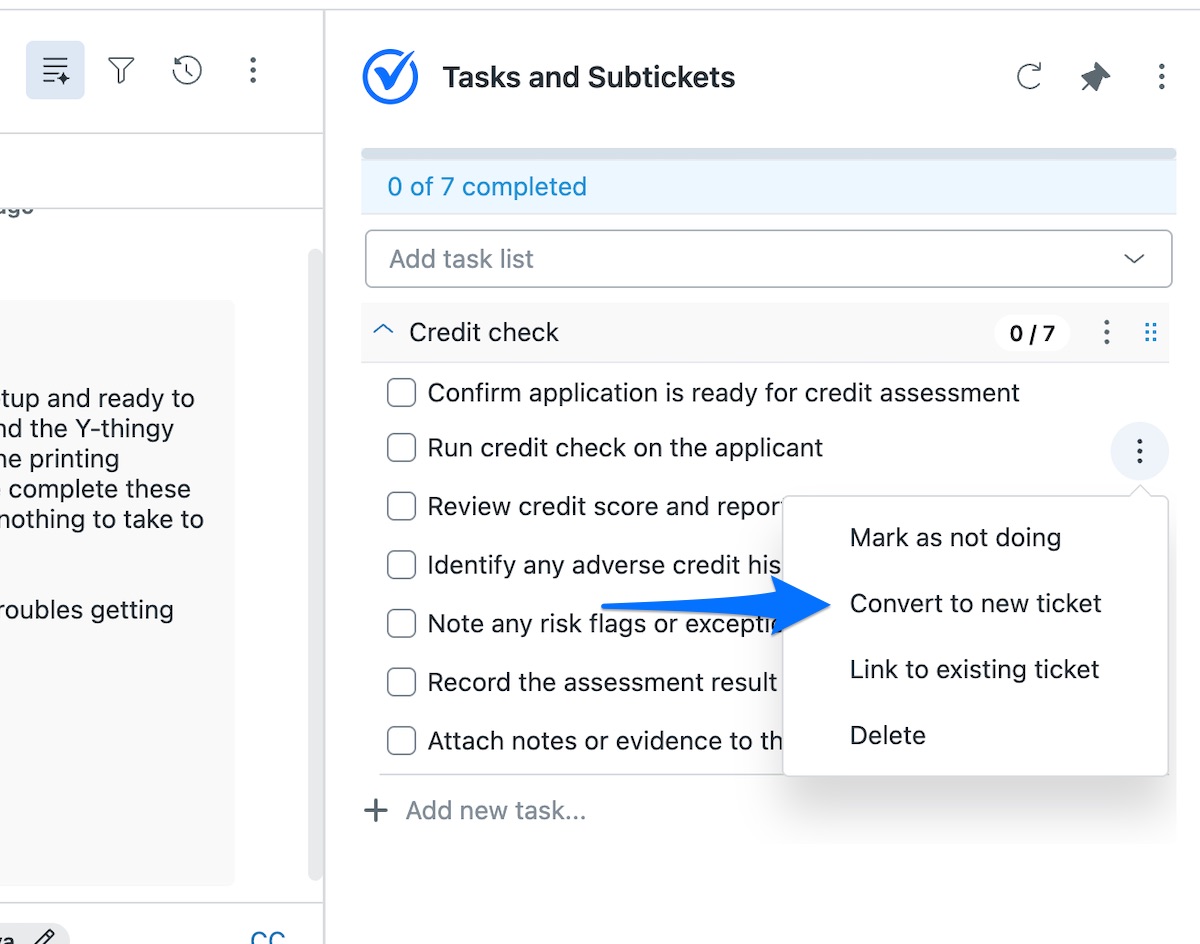
- Click the three dot menu on any task and choose Convert to new ticket.
- Fill in the ticket details: choose which parent fields copy across (requester, subject and comment always do), set the group or agent, then click create ticket.
- The task becomes a real, assignable ticket linked to the parent, and ticks off once that subticket is solved.
- To repeat this, save a ticket template and either pick it on the convert screen, or attach it to a task in a saved list to create the subticket automatically.
Splitting a ticket is how one request that touches several teams gets done without a single agent owning all of it. Facilities, IT and finance each get their own ticket, and the requester still sees one clear parent.
The quickest way is the SweetHawk Suite: one click installs Tasks & Subtickets and the rest of the suite into your account, with a free trial and no credit card. You can also install Tasks & Subtickets on its own from the Marketplace.

How this compares to native Zendesk
Zendesk can create child tickets through side conversations, but they are created one at a time by hand, copy only limited information, and cannot be reported on as a parent and child hierarchy. Subtickets are full tickets with field copy, assignment and a link back to the parent, which is what most teams actually want. If you have used side conversation child tickets and found them thin, this is the difference.