How do I create child tickets linked to a parent ticket in Zendesk?
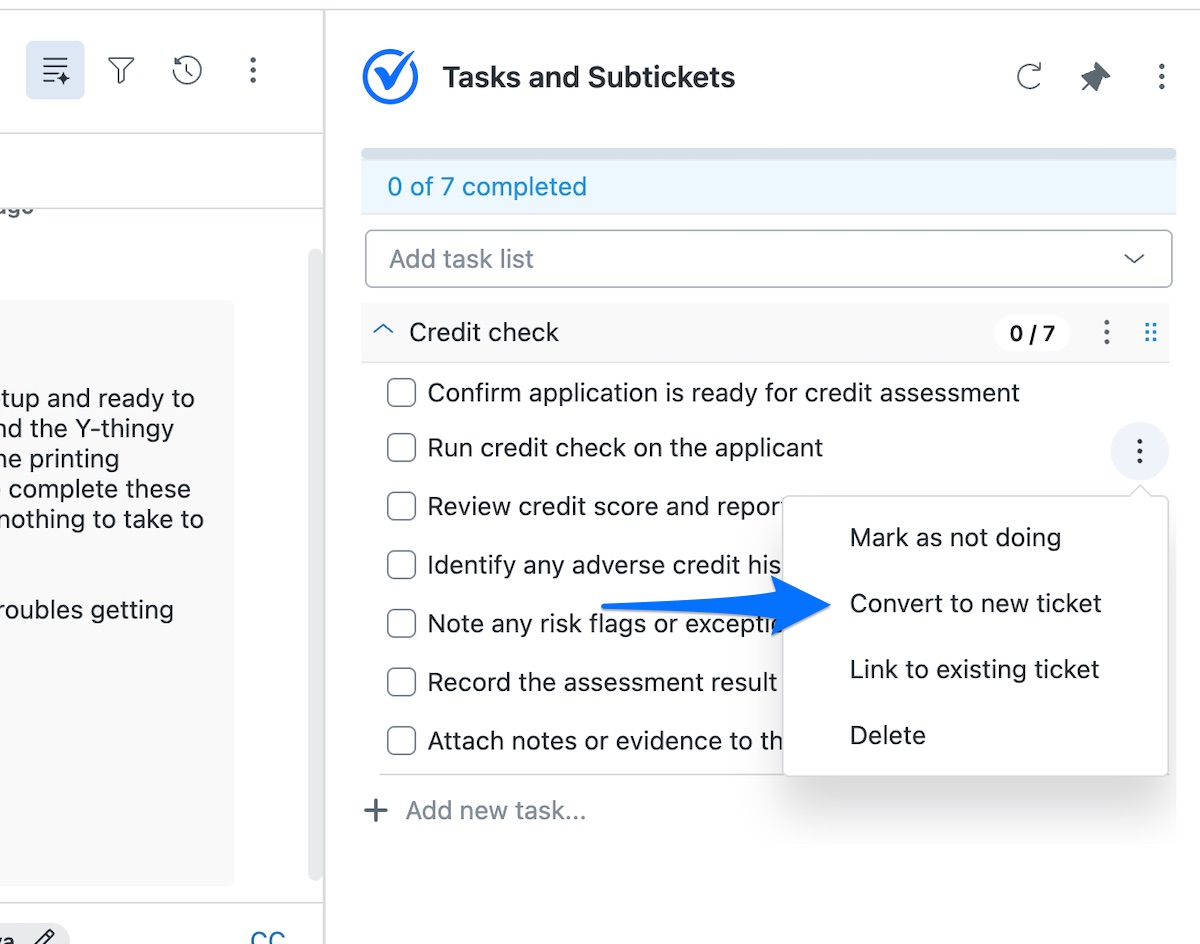
Click the three dot menu next to any task in the Tasks and Subtickets app and choose Convert to new ticket, or automate it by defining the subticket on a saved task list, using a ticket template to pre-fill it from the parent. Either way the child stays linked to the parent.
How to do it with Tasks and Subtickets
- The quick way: on a ticket, open the Tasks and Subtickets app, click the three dot menu on a task, choose Convert to new ticket, and fill in the details.
- For a repeatable setup, save a ticket template: in the app go to Ticket templates, click Add ticket template, choose which parent fields copy across, then click Create ticket template.
- Then in Task lists, open a task, click Define subticket, and pick your template. The task then creates a linked child automatically when the list is used.
- Saved templates also appear on the convert screen, so an agent can pick one in a single click when converting by hand.
- Every child links to the parent, and the parent task completes once the child is solved.
Converting a task is fastest when you are already on the ticket. Ticket templates are worth setting up once you create the same kind of child ticket again and again, since they pre-fill from the parent and can be applied automatically.
The quickest way is the SweetHawk Suite: one click installs Tasks & Subtickets and the rest of the suite into your account, with a free trial and no credit card. You can also install Tasks & Subtickets on its own from the Marketplace.

How this compares to native Zendesk
Native side conversation child tickets exist, but they are manual and light on field copy, and there is no automatic creation or reporting across the parent and its children. SweetHawk creates and links them for you and keeps the parent in sync as they progress.