How do I add a checklist of tasks to a Zendesk ticket?
Build a task list once as a template in the Tasks and Subtickets app, then add it to any ticket from the Add task list dropdown, or type one off tasks straight onto the ticket. Turn on Required to block solving until every task is ticked off.
How to do it with Tasks and Subtickets
- Open the Tasks and Subtickets app, go to Task lists, and click Add task list.
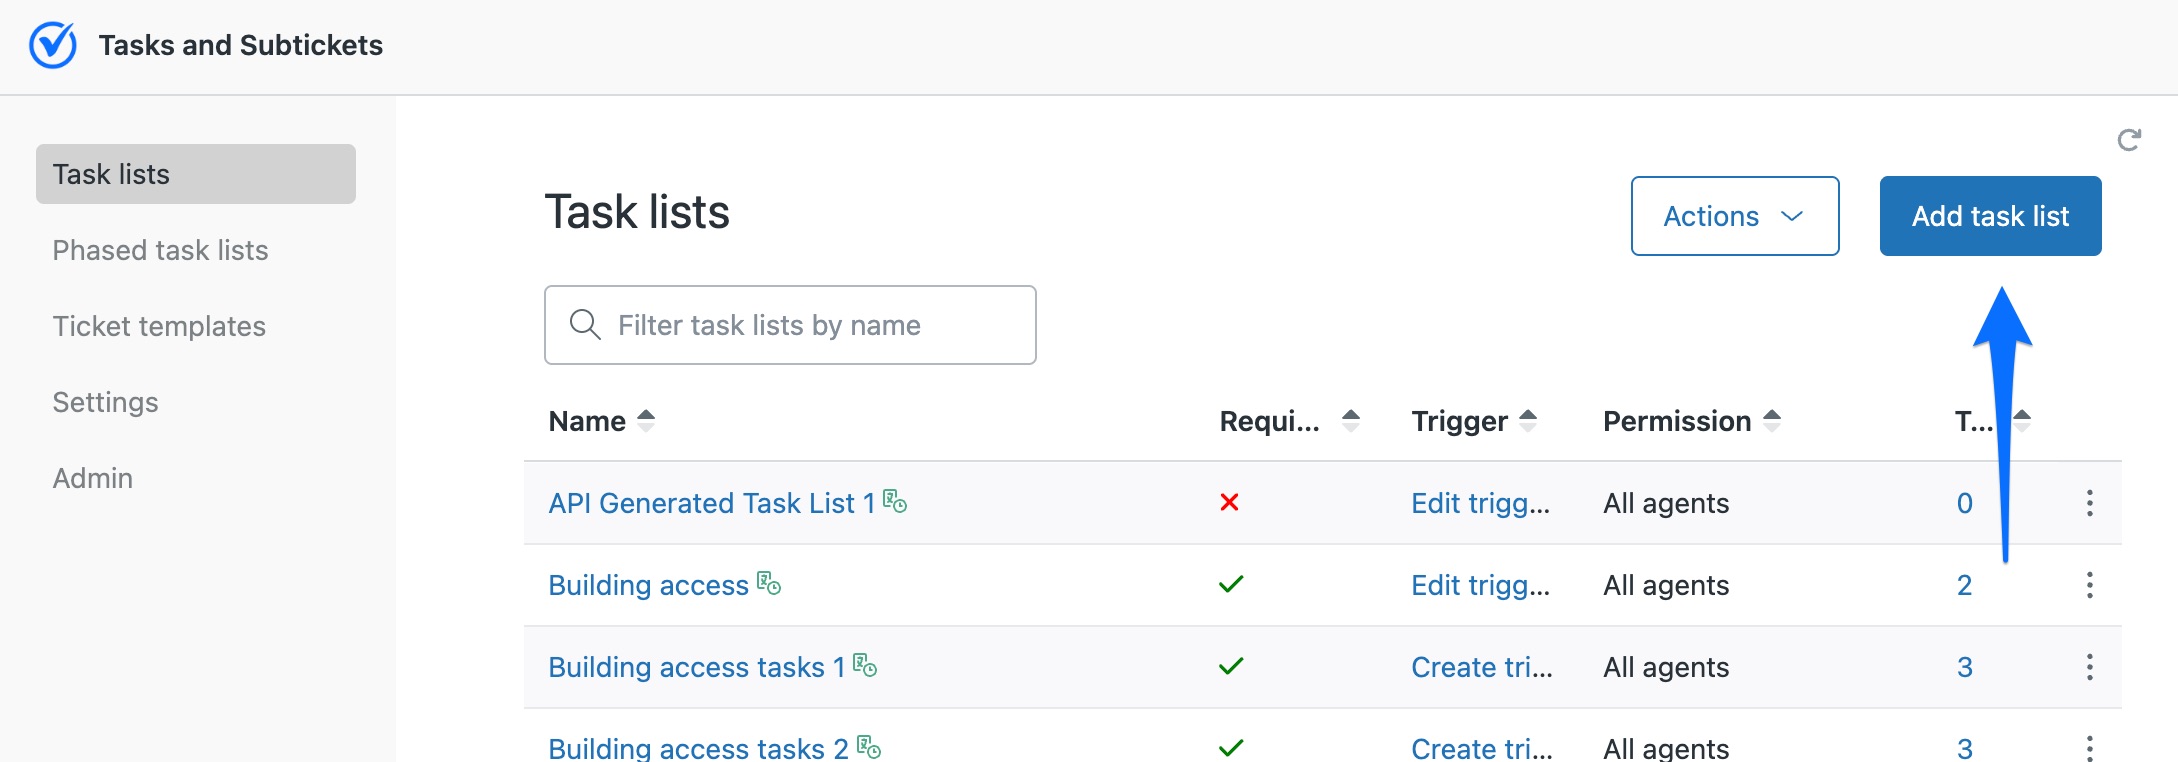
- Name the list, turn on Required, and set who can add or remove it under Access permissions.
- Optionally use Ticket updates to change the ticket when the list completes. Then click Create task list and add each task with Add task.
- On a ticket, open the app and pick your saved list from the Add task list dropdown.
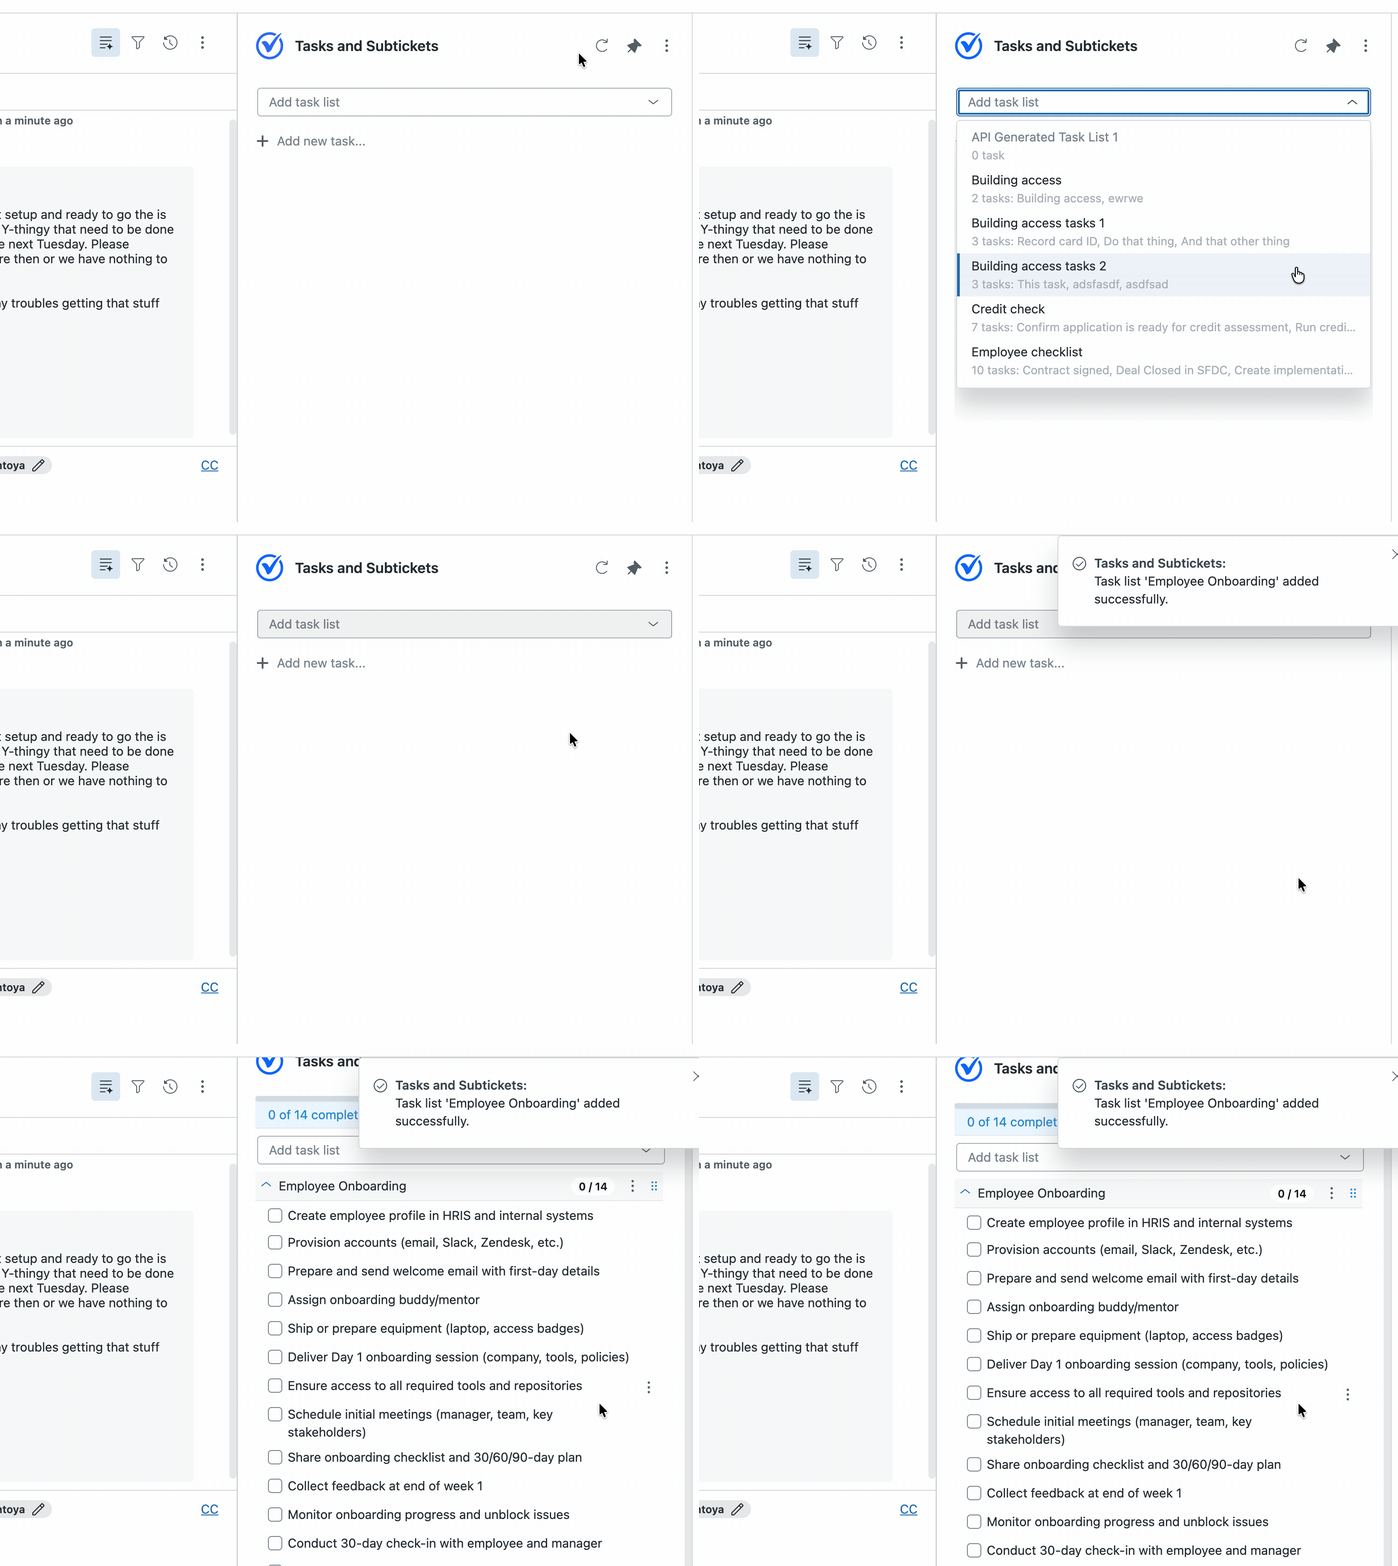
- Agents tick tasks off as they go, and with Required on, the ticket cannot be solved until all are done.
Checklists keep repeatable work consistent. Whether it is a refund, a change request, or a QA pass, a saved task list makes sure every agent follows the same steps and nothing is skipped.
The quickest way is the SweetHawk Suite: one click installs Tasks & Subtickets and the rest of the suite into your account, with a free trial and no credit card. You can also install Tasks & Subtickets on its own from the Marketplace.
How this compares to native Zendesk
Zendesk now has a basic native task list, a single checklist you build on the ticket. It is fine for a one off list, but it does not give you reusable templates, more than one list per ticket, ordering or dependencies between tasks, or the ability to turn a task into its own assignable ticket. SweetHawk adds all of that.