Quick Guides / Calendar
How do I see my Zendesk tickets on a calendar view?
Short answer
In the Calendar app, attach a dated event to a ticket, then open the top bar Calendar to see those tickets on a day, week, or month view, with drag and drop to reschedule.
How to do it with Calendar
- As an admin, install and open the Calendar app, click Calendars, then Add calendar to hold your ticket events.
- On a ticket, open the Calendar app and click the Add event drop-down, then select your calendar. Instead of typing the start and end time, click Create in Calendar: the top bar Calendar opens so you can drag the event straight onto the grid to set when it happens.
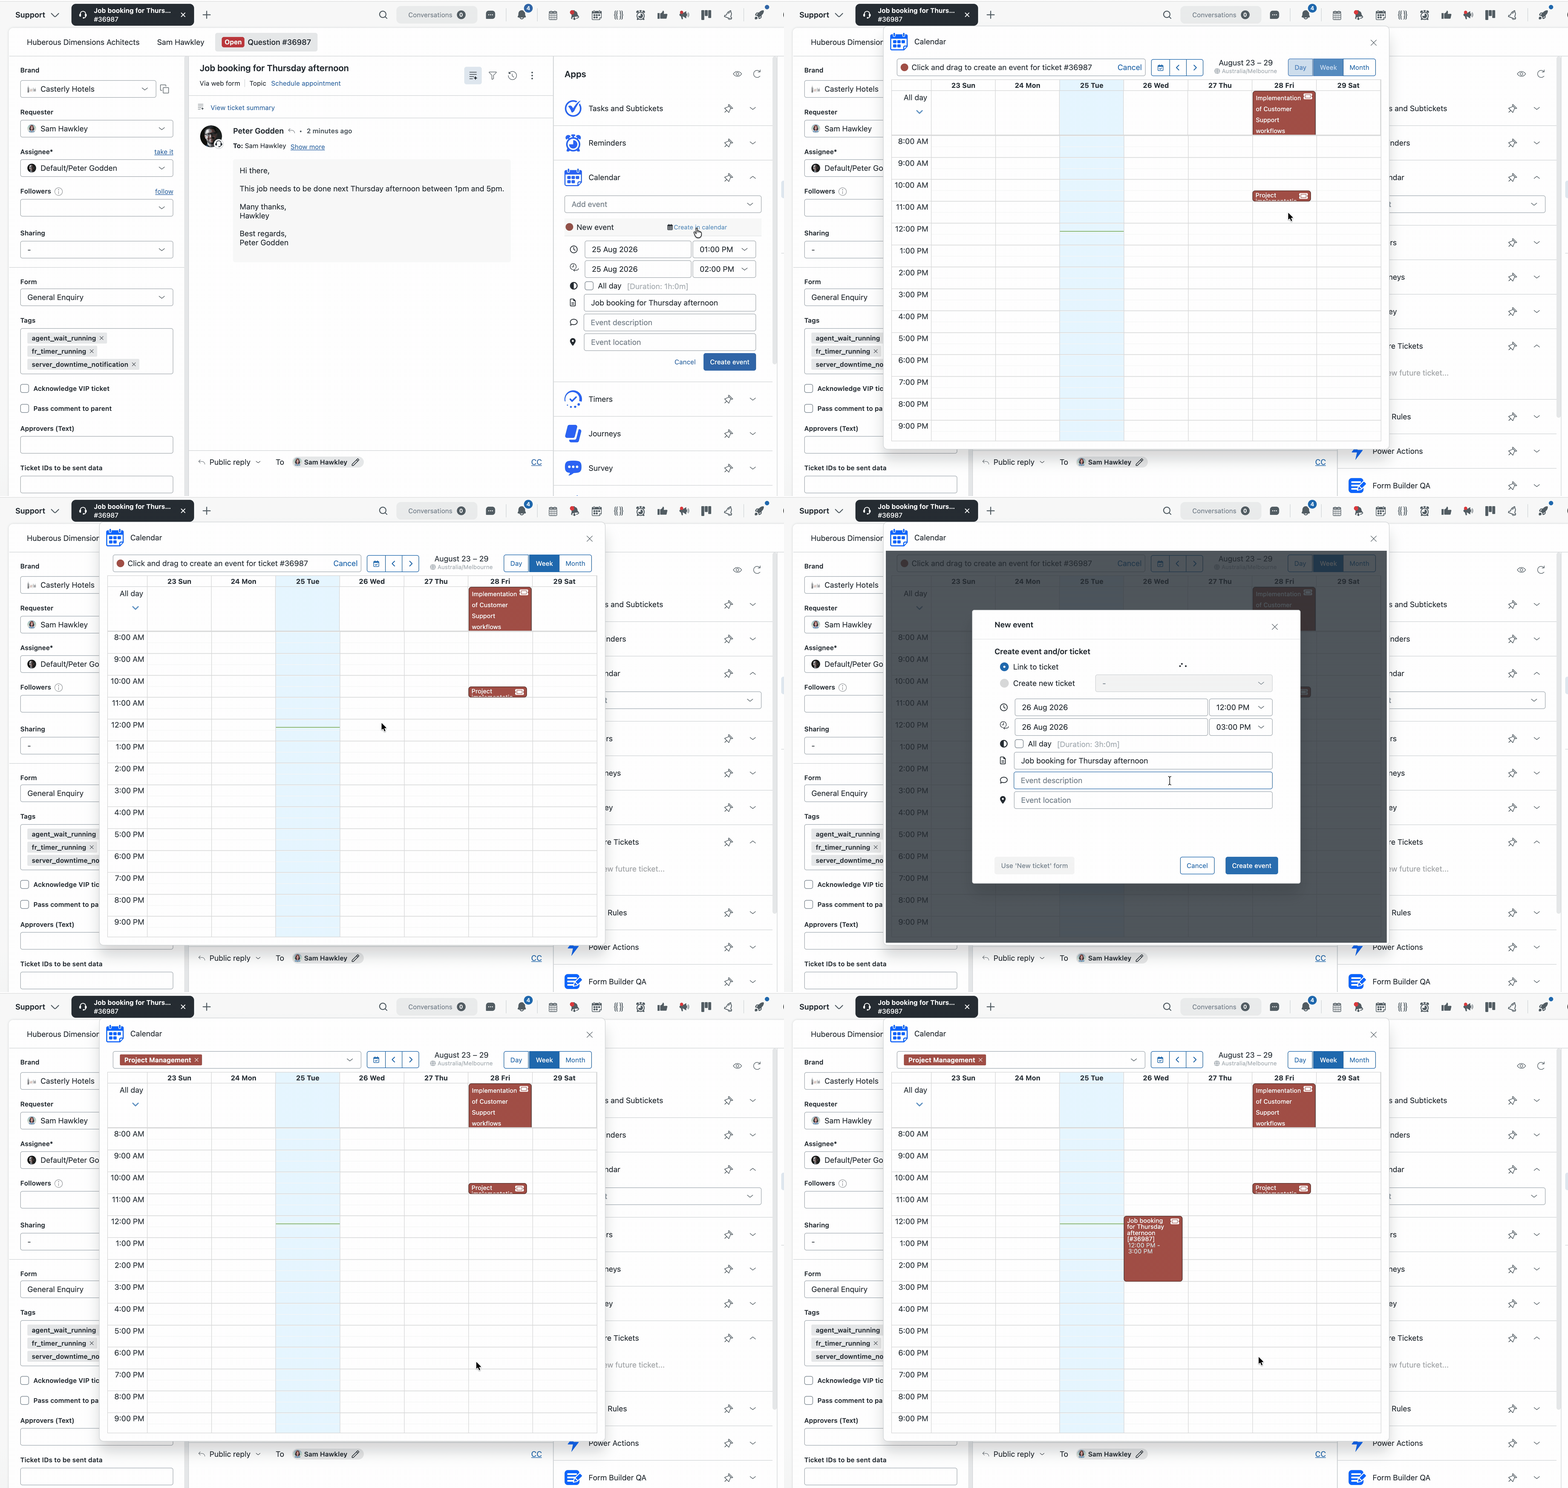
- In the top bar Calendar, switch between day, week, and month views, and drag an existing event to reschedule it. You can reopen it any time from the calendar icon at the top right.
- For a list instead of a grid, first get the event's date onto the ticket: the app does not store it as a field by default, so set that up once with a Calendar workflow. Then create a Zendesk view under Workspaces, Agent Tools, Views with those fields as columns.
Zendesk shows tickets as lists and queues, which is fine for triage but hides when work is due to happen. A real calendar lets an agent or dispatcher see the shape of the day or week and spot gaps and clashes before booking over them.
Get it in your Zendesk
The quickest way is the SweetHawk Suite: one click installs Calendar and the rest of the suite into your account, with a free trial and no credit card. You can also install Calendar on its own from the Marketplace.