Quick Guides / Calendar
How do I give my team a shared calendar of scheduled tickets in Zendesk?
Short answer
In the Calendar app, create an organization-wide calendar and set read and write permissions by role, group, or user. The whole team then sees every scheduled ticket on shared day, week, and month views.
How to do it with Calendar
- As an admin, open the Calendar app, click Calendars, then Add calendar. Give it a clear name such as Install crew and pick a color.
- In the calendar Settings, set read and write permissions by any mix of role, group, or specific users, then click Create calendar.
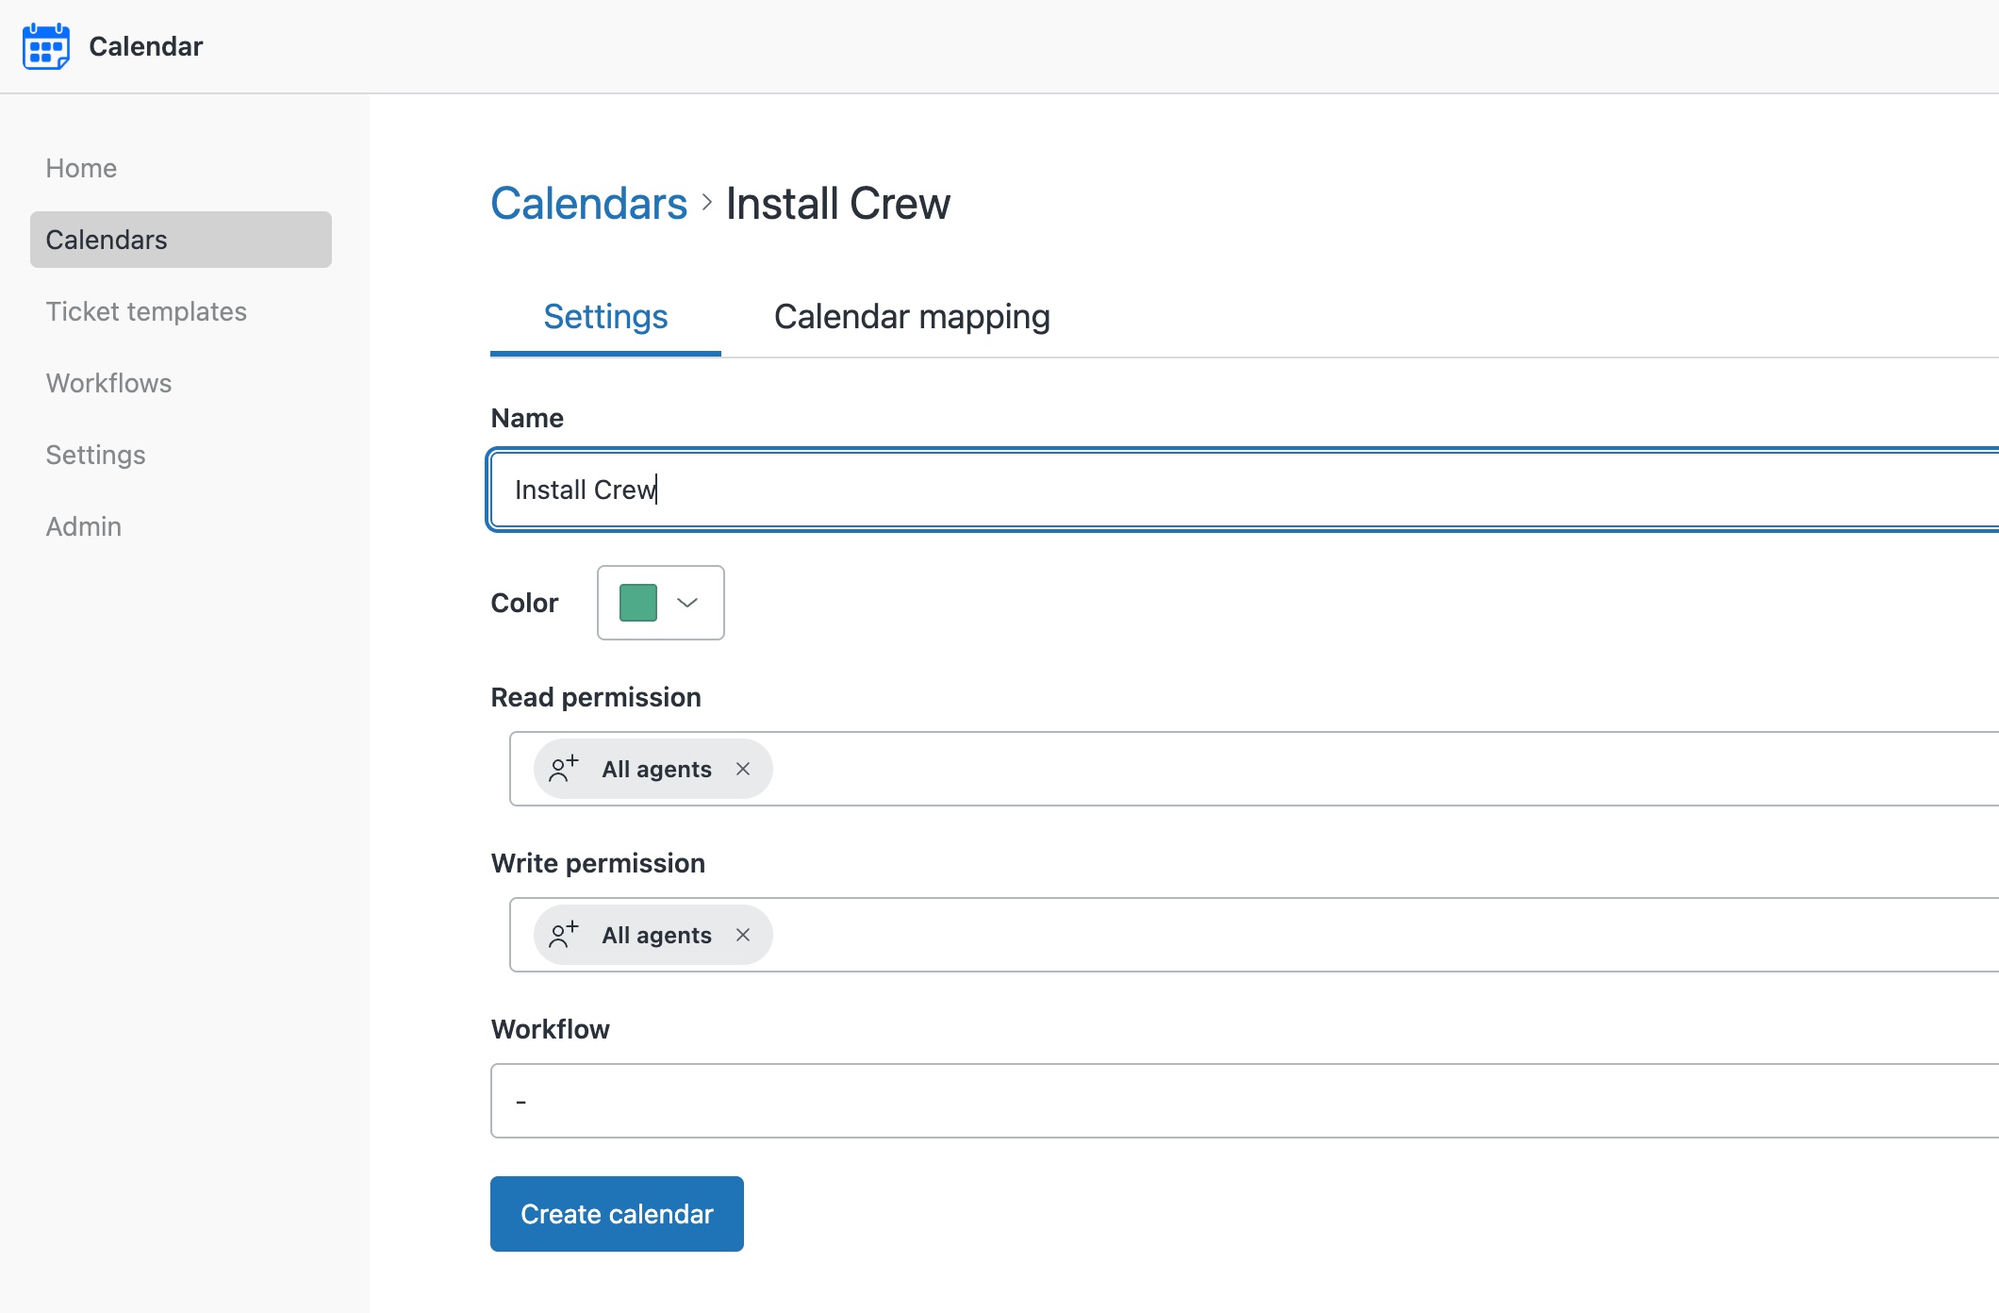
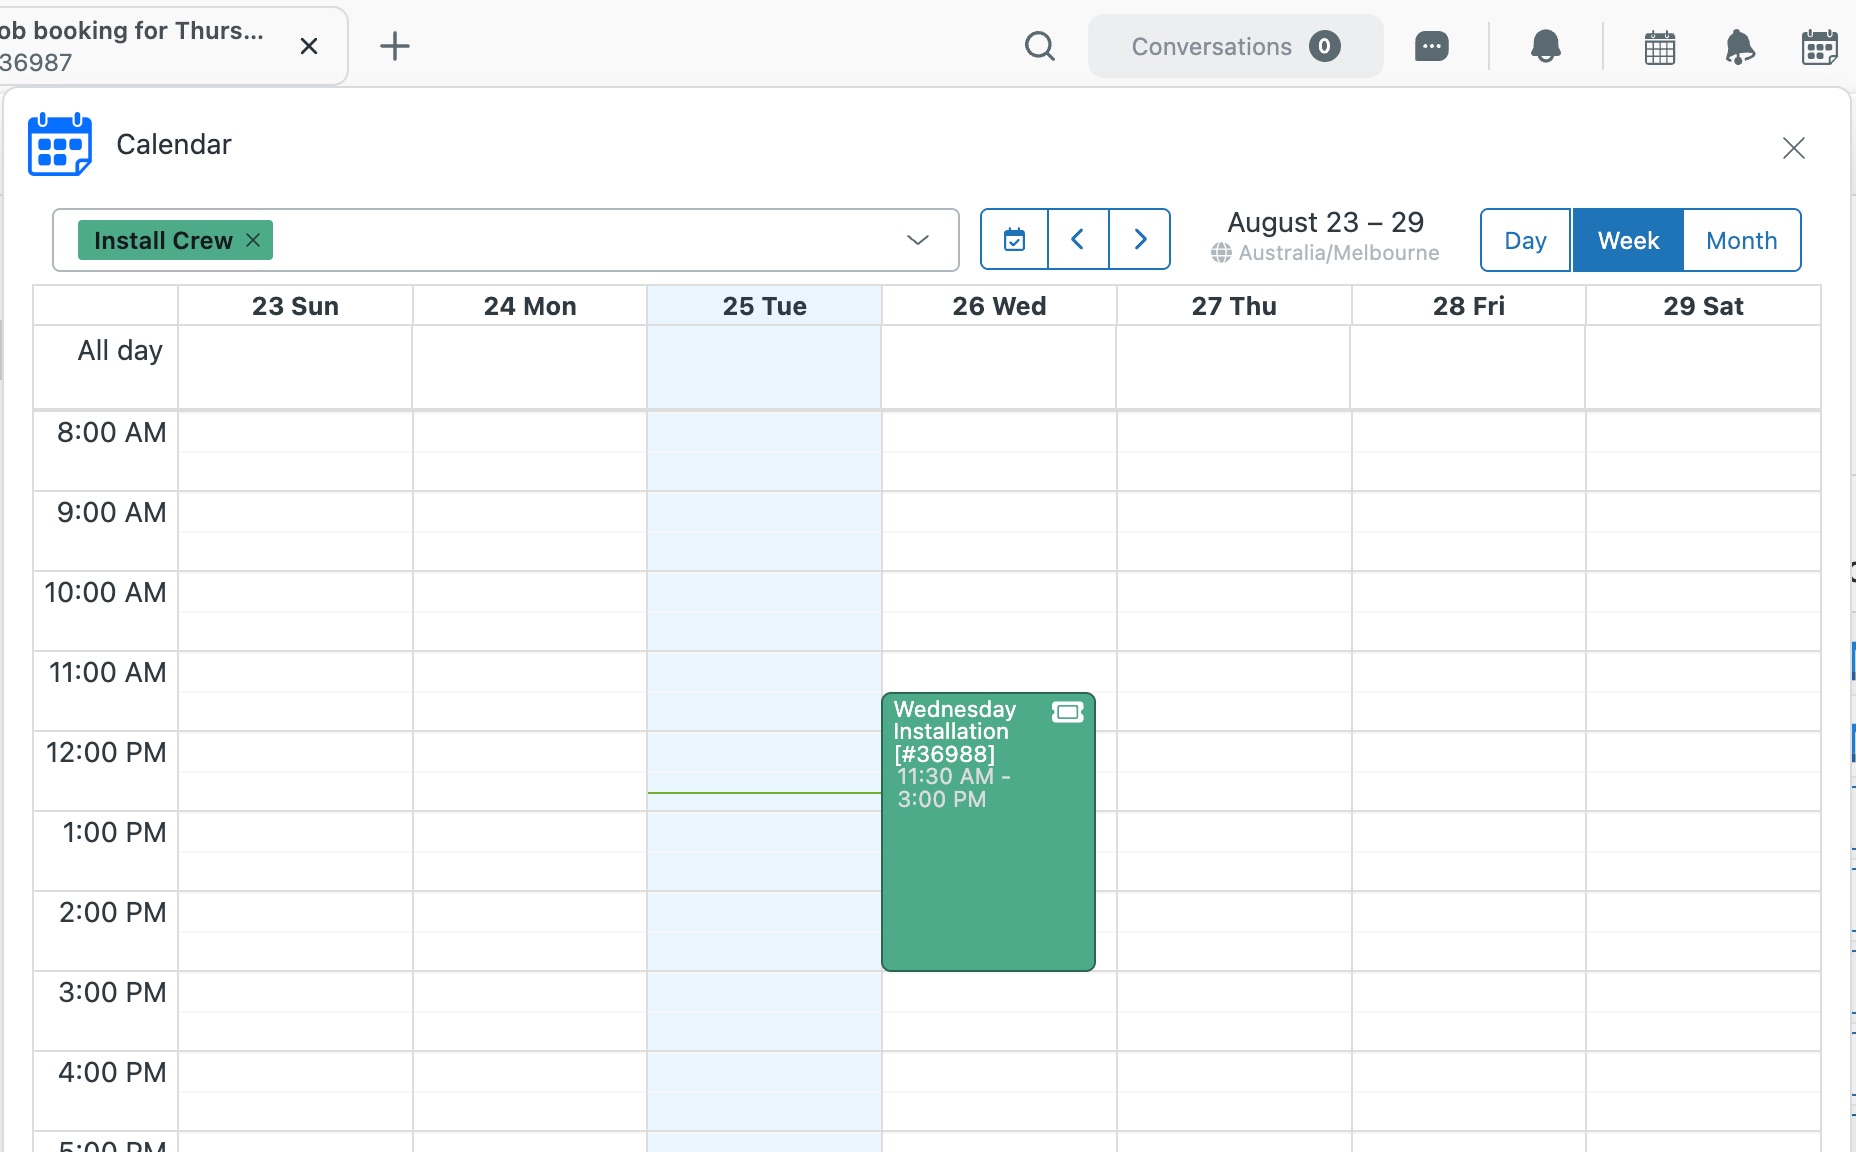
- Agents attach events to tickets on this shared calendar, and each appears on the team calendar.
- Anyone with read access opens the top bar Calendar and switches between day, week, and month views, with drag and drop to reschedule.
- Optionally open the calendar's Actions drop down to connect a shared Google or Microsoft account for two-way sync.
When scheduling lives in each agent's private calendar, no one can see the team's real capacity, and double-bookings and gaps go unnoticed. A shared calendar gives dispatchers and managers one honest picture of who is doing what and when, with permissions so sensitive calendars stay restricted.
Get it in your Zendesk
The quickest way is the SweetHawk Suite: one click installs Calendar and the rest of the suite into your account, with a free trial and no credit card. You can also install Calendar on its own from the Marketplace.