How do I write a calendar event's date and time onto a Zendesk ticket field?
The Calendar app does not store an event's date on the ticket by default. Create the ticket fields you want, build a Calendar workflow that maps them to the event placeholders (for example {{calendar_event.start_at}}) when an event starts, then attach that workflow to your calendar. Every event then writes its date and time onto the ticket, ready for views and reporting.
How to do it with Calendar
- In Zendesk Admin Center, create the ticket fields you want to fill, for example a Date field named Calendar event start date. Note each field so you can pick it in the workflow.
- In the Calendar app, open Workflows and click Add workflow at the top right.
- Set the workflow to run when a calendar event starts, for example Calendar event started.
- Under Zendesk ticket updates, add each ticket field, then click the </> or + on the right and pick the matching Calendar placeholder, for example Calendar event start date and Calendar event start time (these insert the timezone-aware
{{calendar_event.start_at}}placeholder for you). Save the workflow.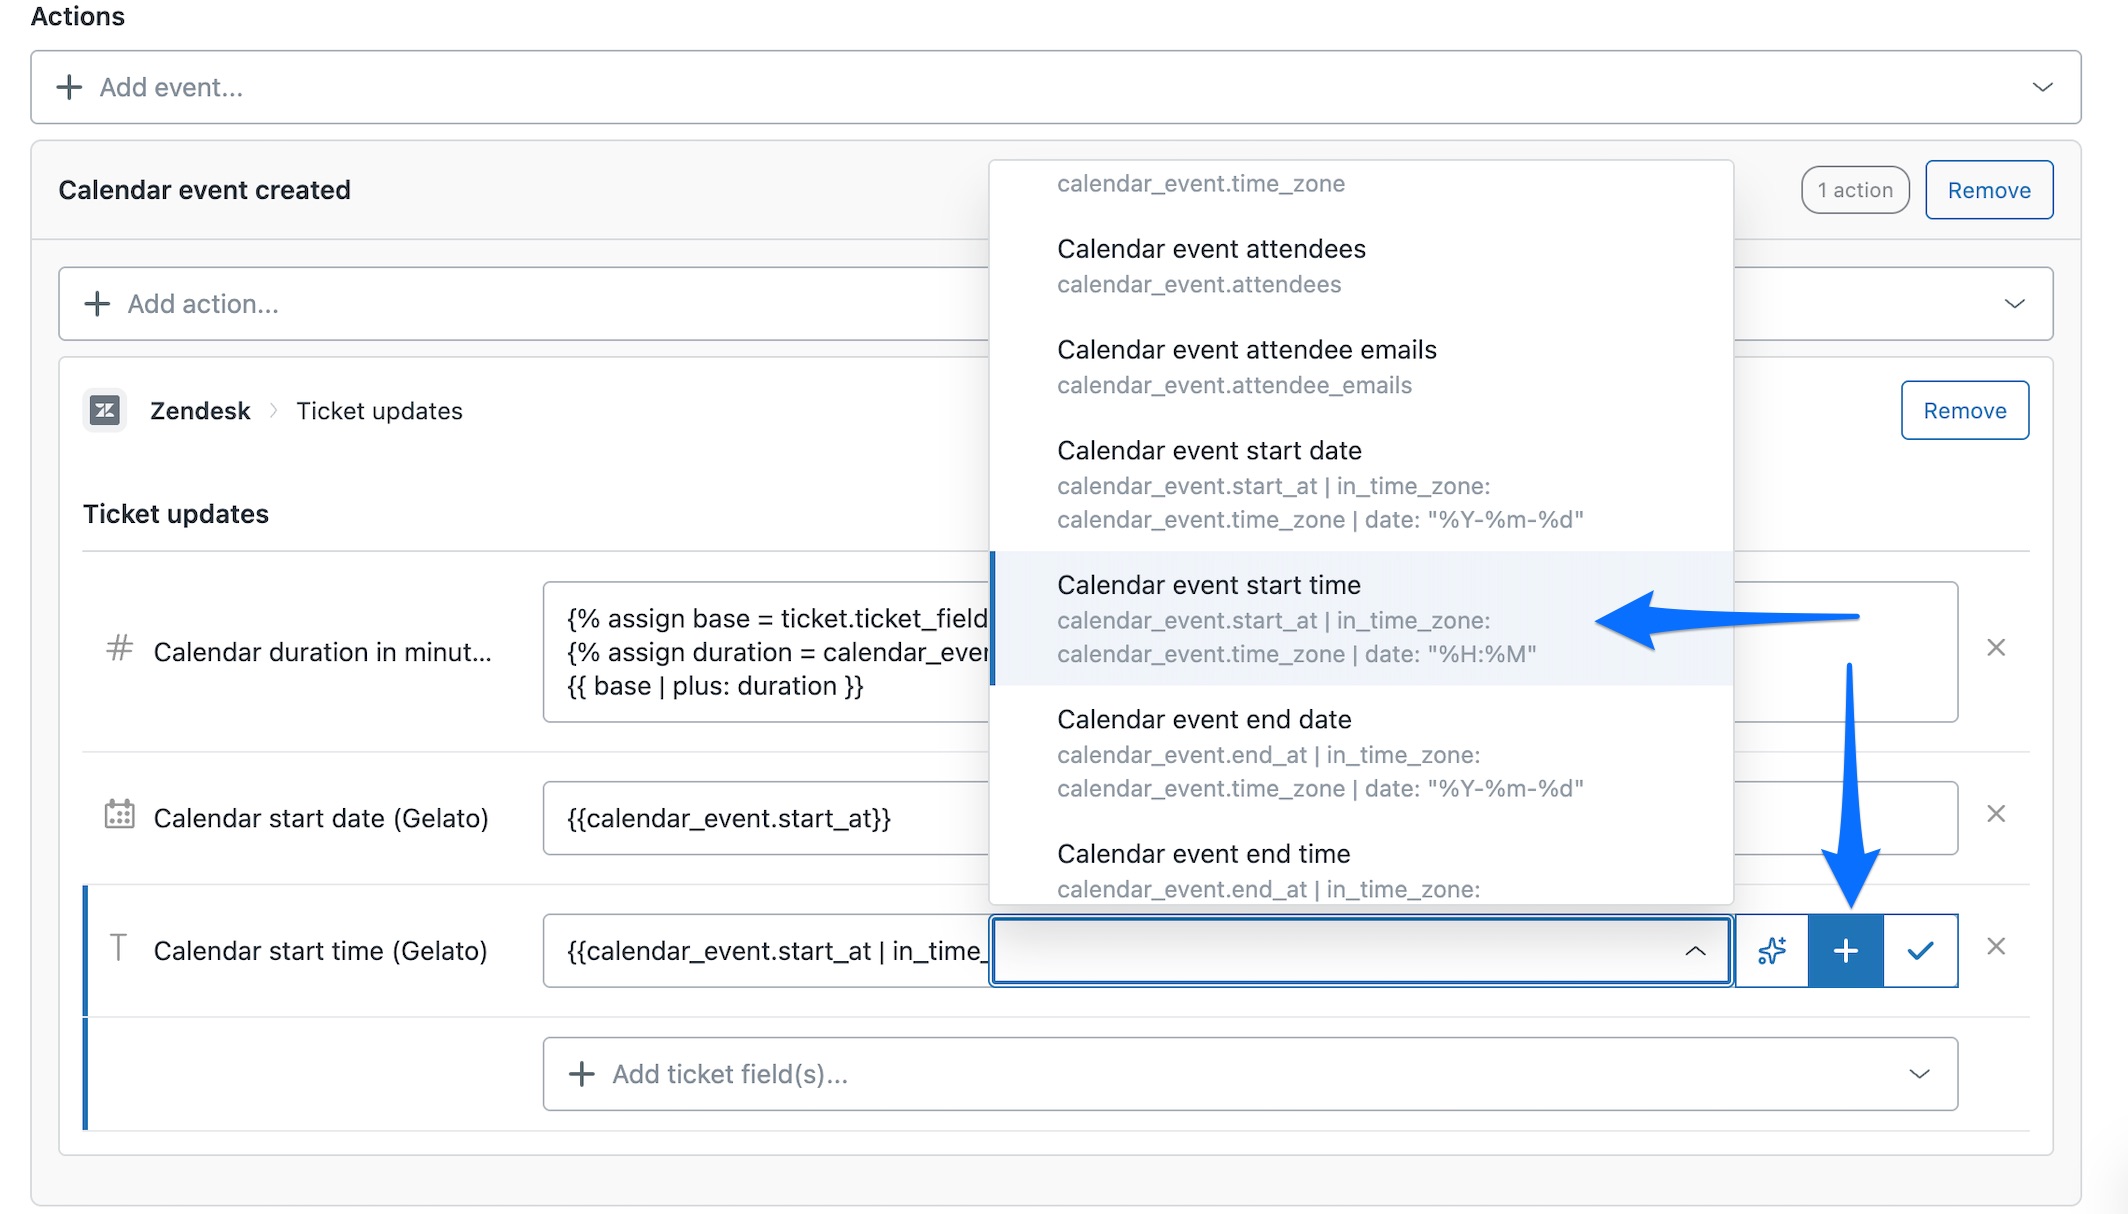
- Apply it to your calendar: open Calendars in the admin area of the app, click your calendar, and under Settings at the bottom select the workflow.
- Now every event writes its date and time onto the ticket, so you can build a Zendesk view or an Explore report on scheduled work.
The calendar grid is the quick way to see scheduled work, but to sort, filter or report on it you need the event's date sitting on the ticket as a field. A one-time workflow copies the event's date and time onto the ticket every time, so your views and Explore dashboards stay accurate.
The quickest way is the SweetHawk Suite: one click installs Calendar and the rest of the suite into your account, with a free trial and no credit card. You can also install Calendar on its own from the Marketplace.