How do I set up a multi-step or sequential approval workflow in Zendesk?
In the Approve app, create an approval definition, set the first step's approvers, then click Add approval step below it to add the next step. Each step has its own approvers, Required count and Timeout, and step 2 only starts once step 1 is granted. Add an escalation to a step so a missed timeout is chased rather than simply lapsing.
How to do it with Approve
- Open the Approve app, go to Approval definitions, and click Add approval definition. Give it a clear name.
- Under Recipients, set the first step: add the approver or approvers, or a whole Zendesk group, then set Required and a Timeout.
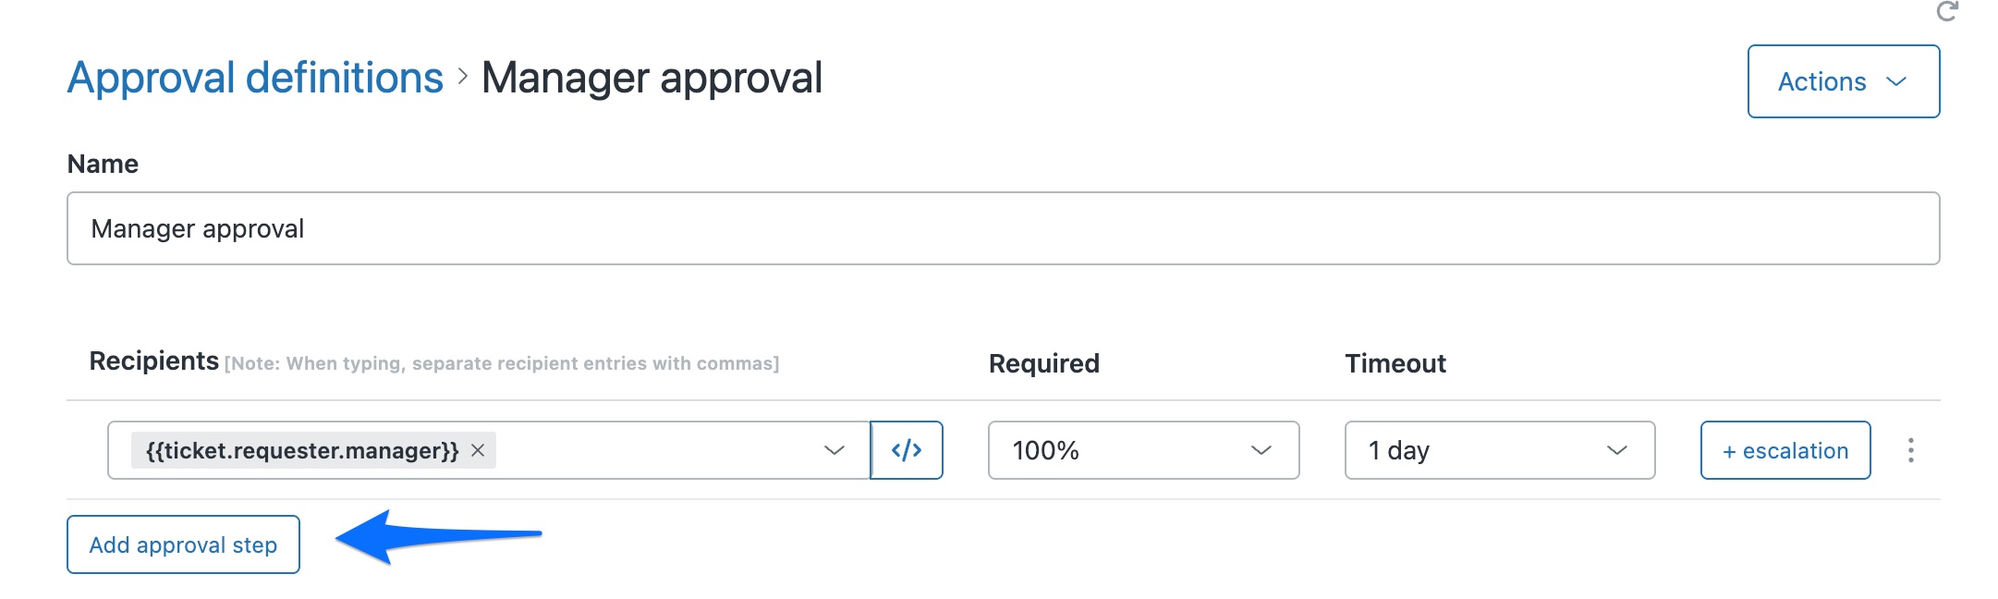
- Click Add approval step below the step to add the next one. Each new step opens only once the previous step is granted.
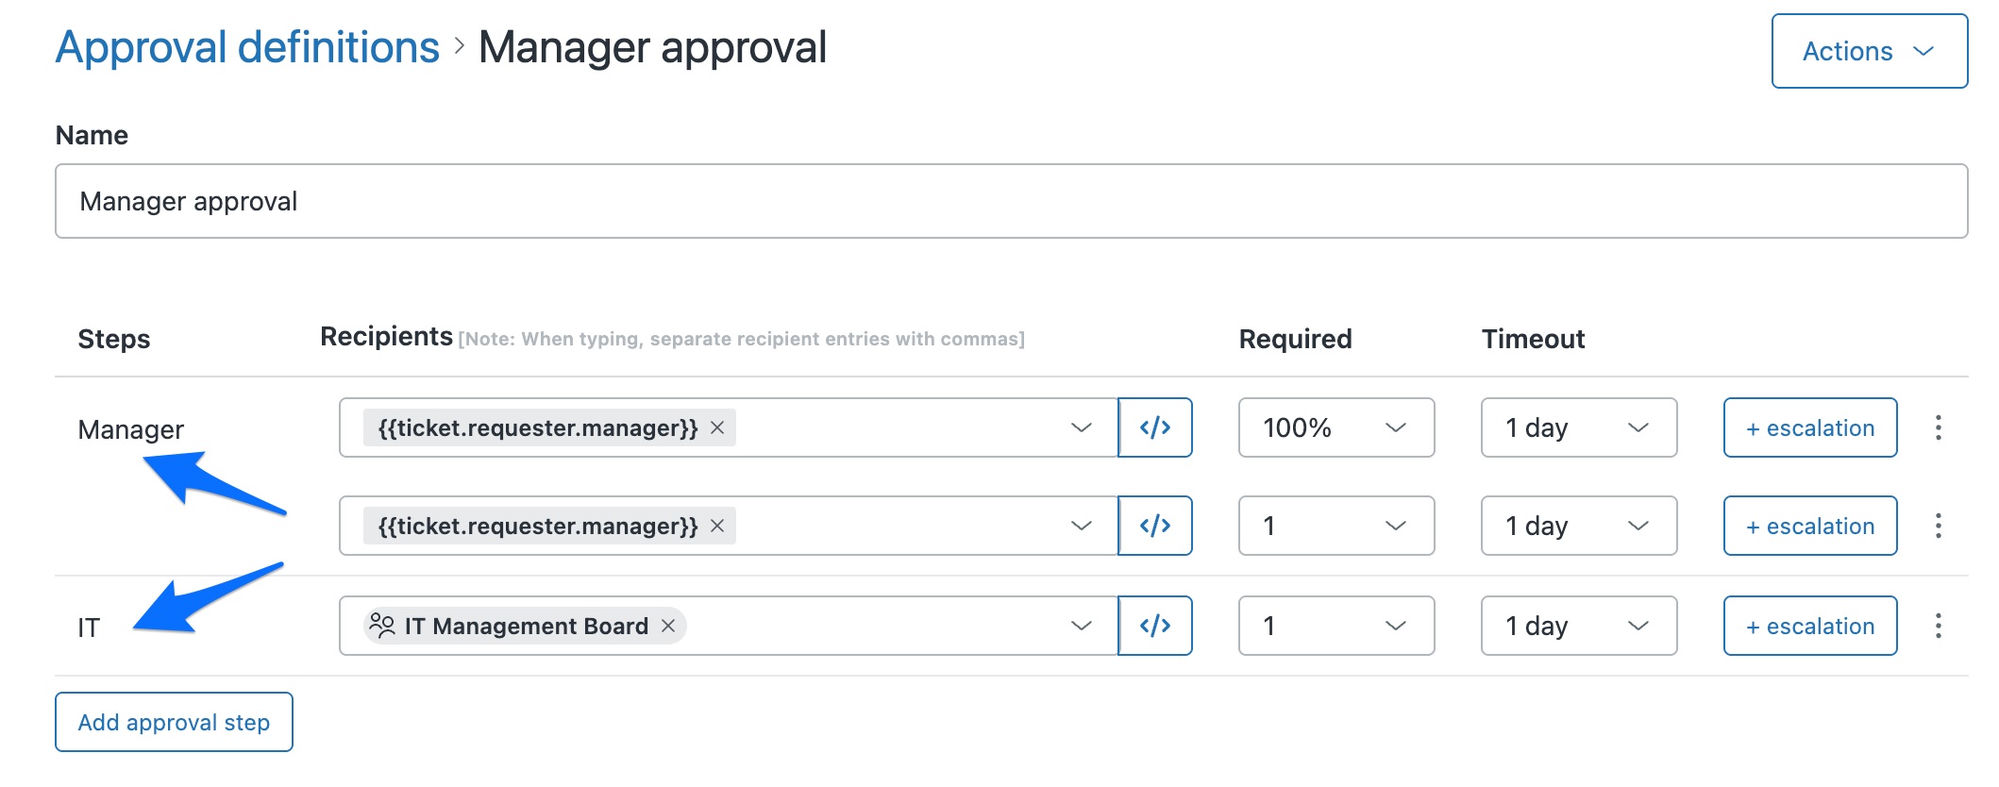
- Name each step in the Steps column, for example Manager then Finance, so approvers can see where they sit in the chain.
- To decide what happens when a step's timeout passes, click + escalation on that step. Rather than letting it lapse you can resend it to the same approver as a reminder, pass it to someone else such as the manager's manager, or name any specific person to take it on.
- Write the Message approvers will see, including the ticket fields they need. To gather those fields fast, use the Liquid AI assistant at the top right of the message box (it needs AI features turned on). Set Ticket updates for each outcome, then click Create approval definition.

Sequential approvals matter when sign-off must happen in a set order: a manager before finance, finance before procurement. Each step opens only once the one before it is granted, so nobody approves out of turn, and an escalation on any step keeps a slow approver from stalling the whole chain.
The quickest way is the SweetHawk Suite: one click installs Approve and the rest of the suite into your account, with a free trial and no credit card. You can also install Approve on its own from the Marketplace.