Quick Guides / Approve
How do I add approval reminders, timeouts and auto-escalation in Zendesk?
Short answer
In an Approve approval definition, set a Timeout on the step, then click + escalation on the right of that step to add an escalation row of backup approvers, or a reminder row with the same approvers timed to fire before the timeout.
How to do it with Approve
- Open the Approve app and your approval definition. On the Recipients step, set a Timeout, the time the step waits before it times out and escalates.
- To escalate, click + escalation on the right-hand side of the step and add an escalation row of backup approvers. It fires when the step times out, or all approvers are unavailable or abstain.
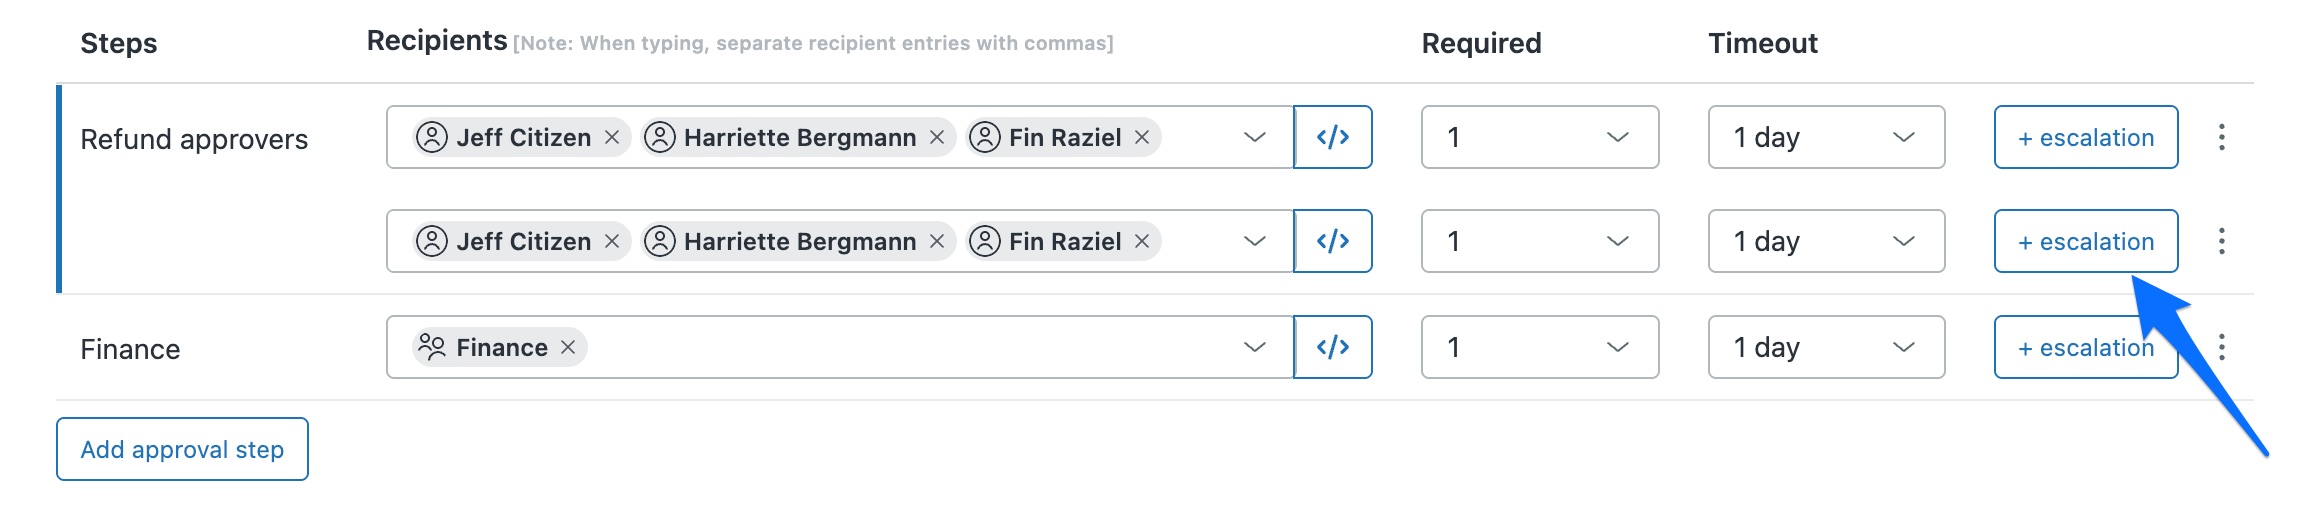
- To remind, add an escalation row with the same approvers, timed to fire before the timeout, for example after 5 days on a 1 week timeout. Only approvers who have not responded are reminded.
- Add as many rows as you need for multiple reminders or escalation levels, then click Update approval definition.
Approvals stall when they sit in a busy person's inbox. A timeout plus an automatic nudge, and a backup approver if that timeout passes, keeps the process moving without an agent chasing anyone by hand.
Get it in your Zendesk
The quickest way is the SweetHawk Suite: one click installs Approve and the rest of the suite into your account, with a free trial and no credit card. You can also install Approve on its own from the Marketplace.