The Zendesk native Type field is set in stone and Zendesk does not allow you to change it. This is a real shame because the field has some unique functionality that isn’t available via any other means.
The good news is that there is a new way for you to add custom ticket types while retaining the unique functionality of the native Type field. Here’s how it can be done in 3 steps using our Zendesk conditional fields app:
Step 1: Create a Zendesk custom field with the Type selections that you actually want.
Step 2: Map the selections of your new field to the options within the native Type field using the Field conditions app.
Step 3: Hide the Type field using the Field conditions app.
Here’s a 5 min video that shows how to set this up from scratch…
[VIDEO]
Step 1
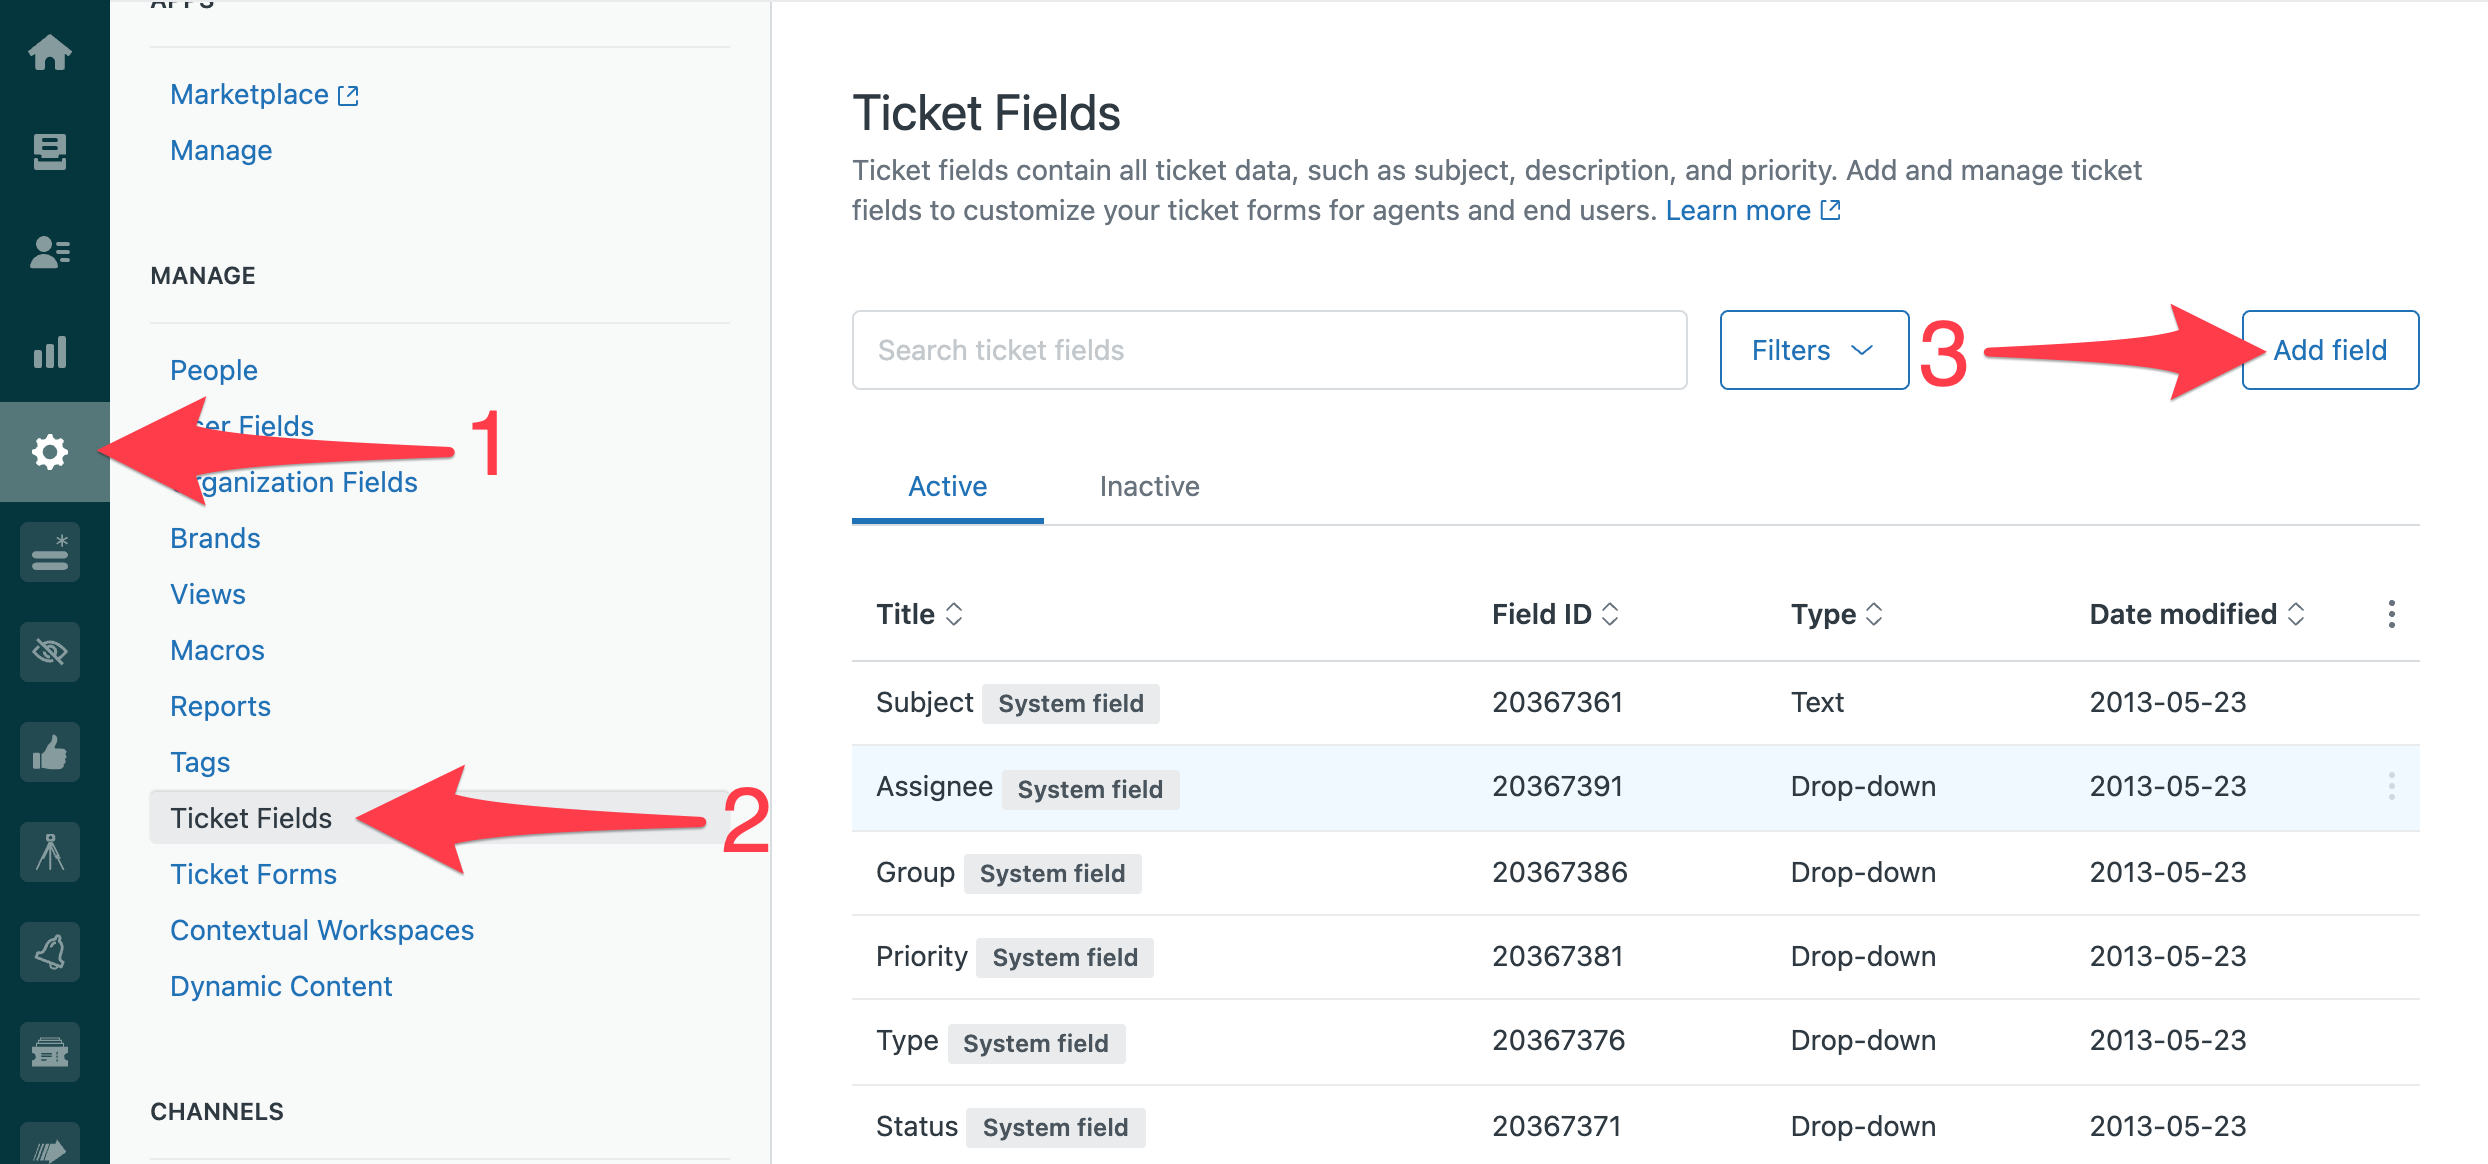
To create a custom Zendesk ticket field click on the cog on the left-hand side of the screen, then on Ticket Fields, then on Add field like this:

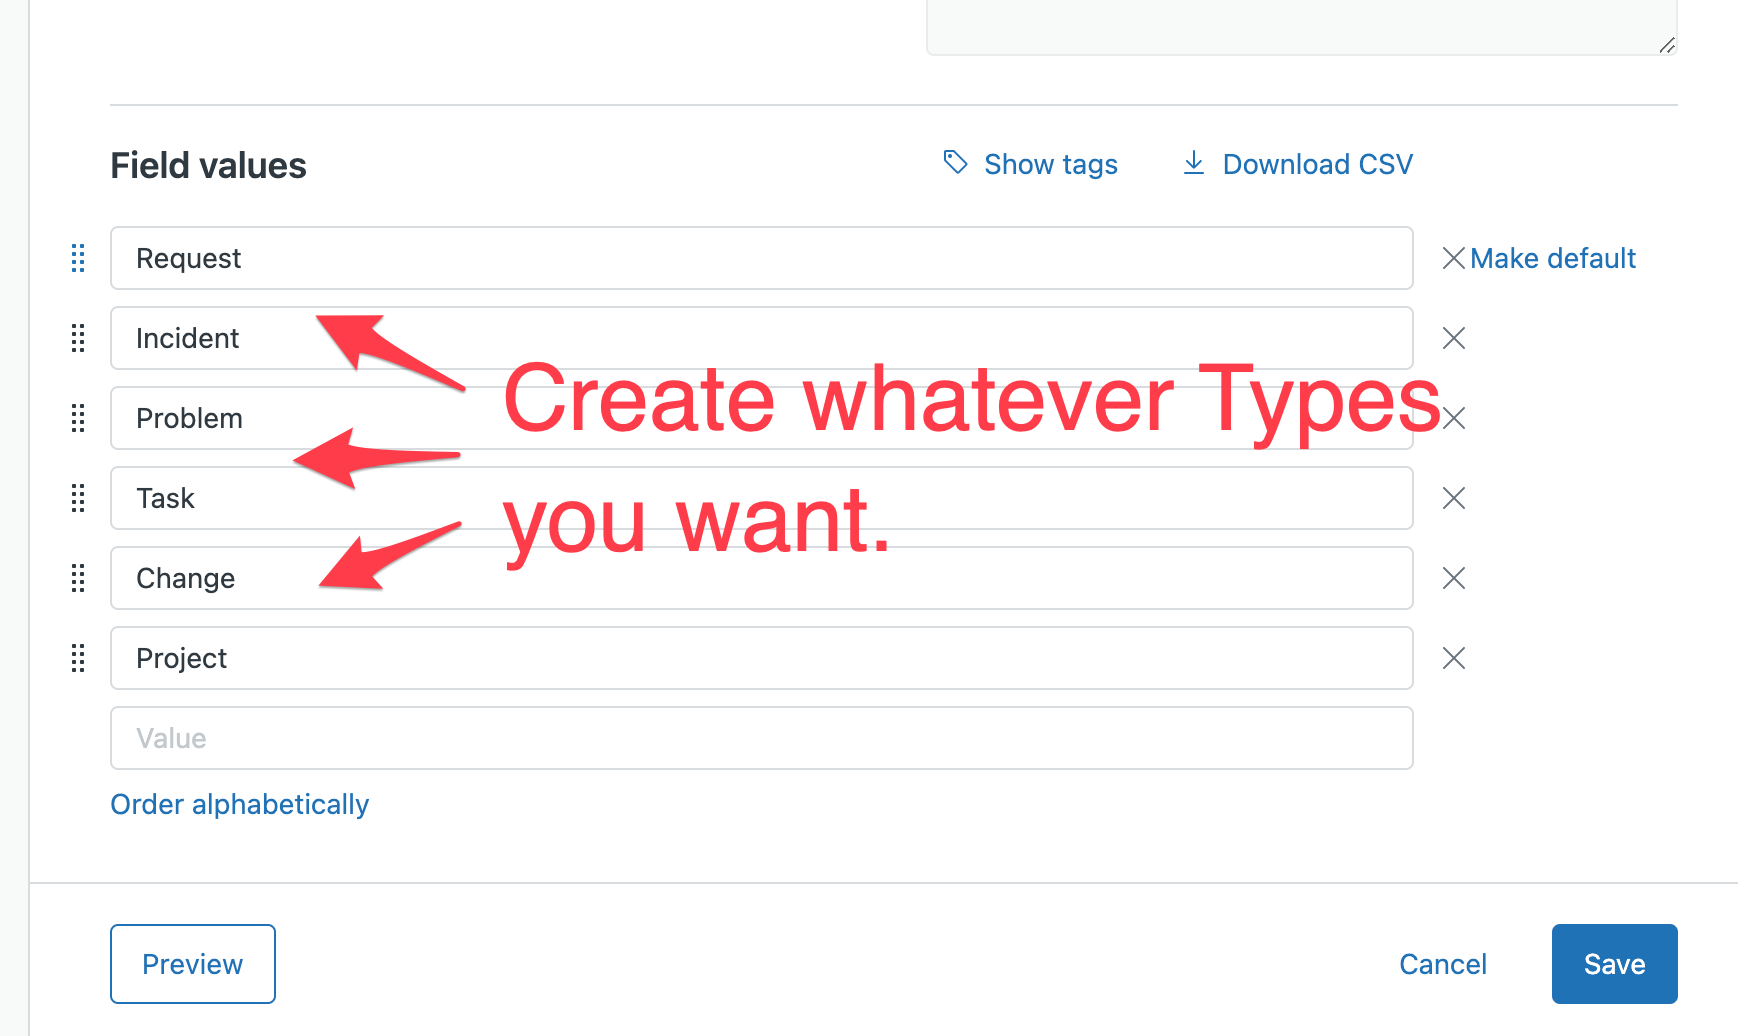
Next, select the Drop-down option, add in the options for the field you want and click Save at the bottom right hand side of the screen.

You’ll then need to place your new field into the Zendesk form(s) you want this field to appear. Note that, for best effect, this field should be placed just above the native Zendesk Type field.
Do not remove the Zendesk Type field from any forms that you want to use your new custom field on.
Step 2
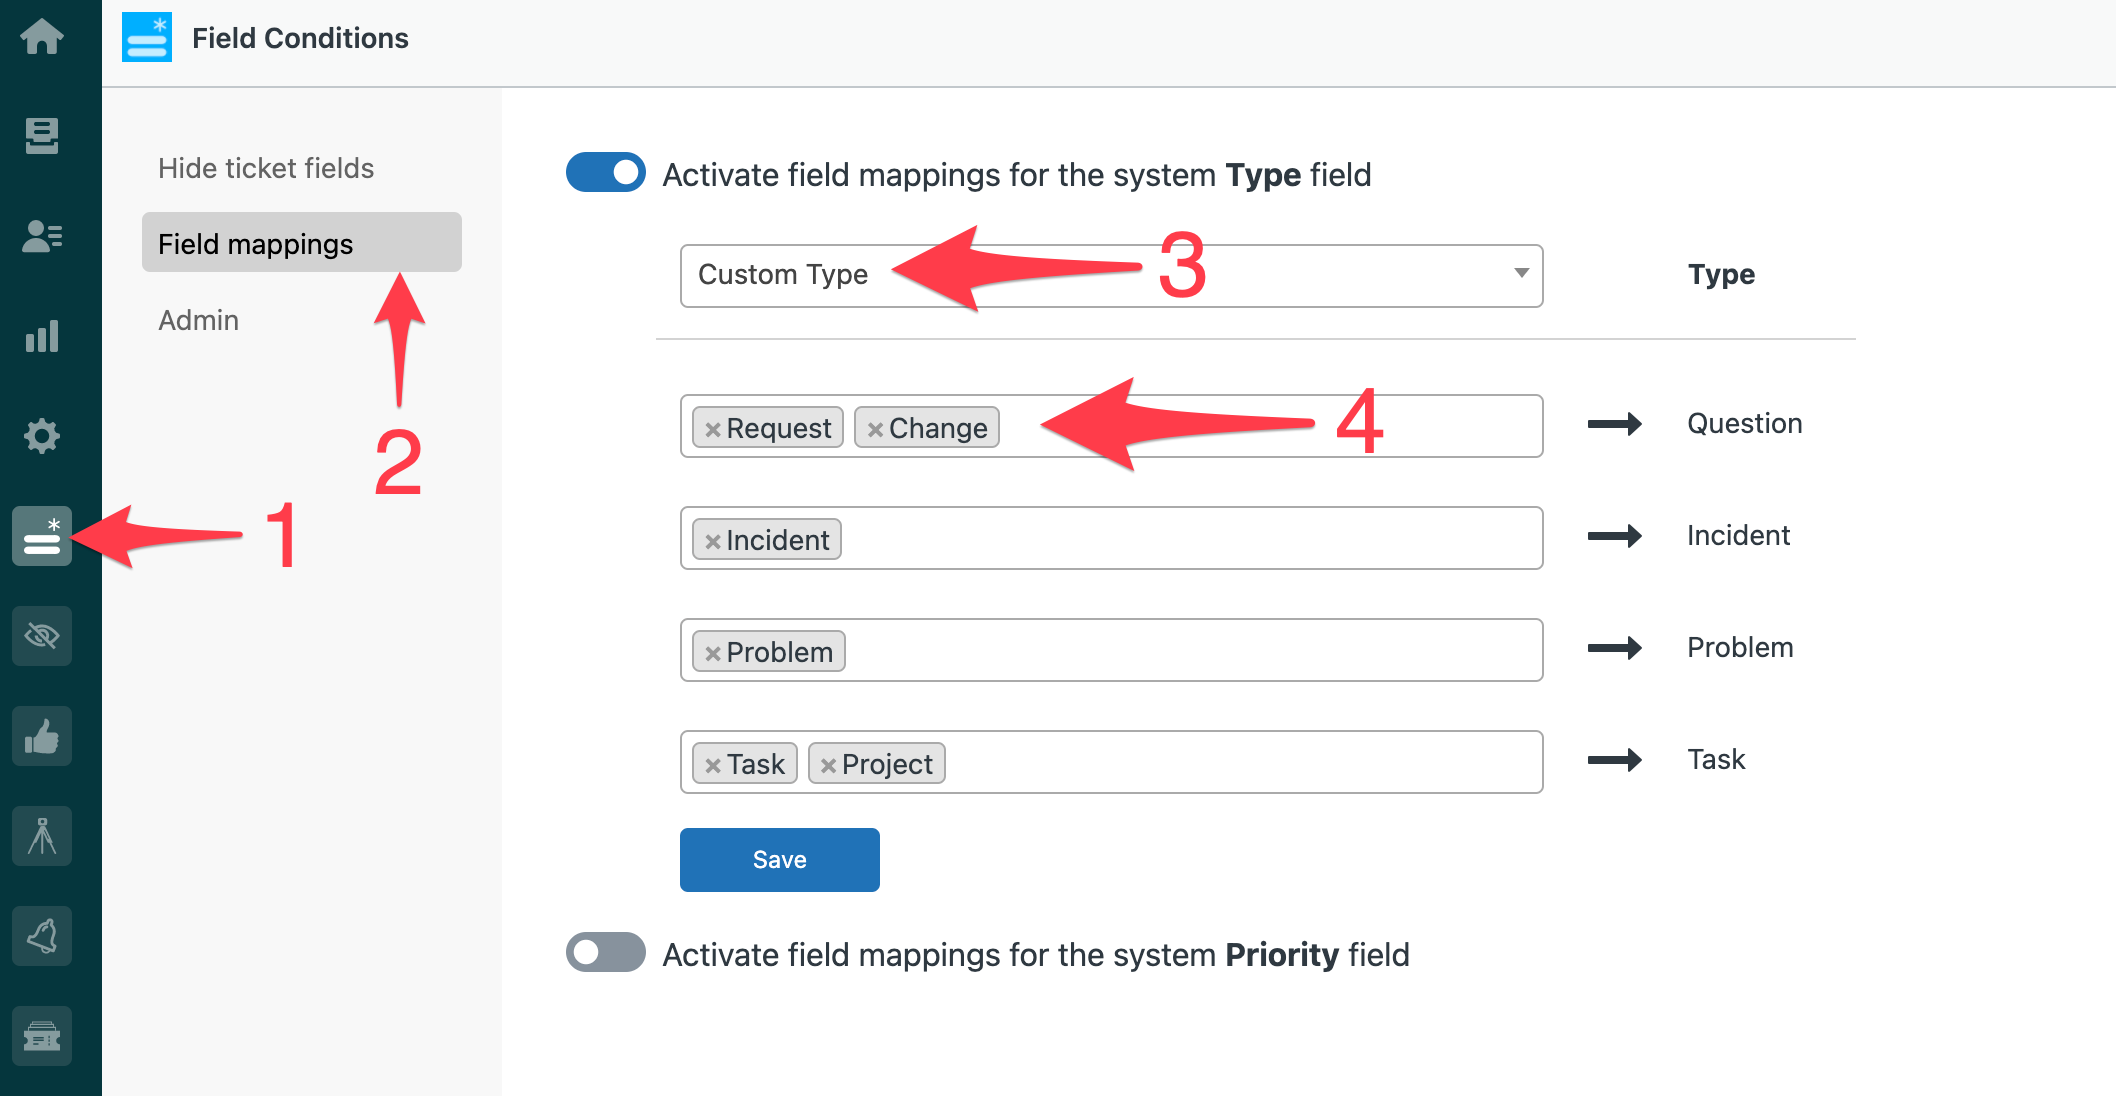
Map the options in your new custom field to values in the native Zendesk Type field by (1) going into the Field Conditions app and (2) click on Field Mappings. Then activate the mapping for the system Type field.
(3) Select the name of the custom field that you just created and (4) make sure every option in your new field equates to an option in the native Type field like this:

Step 3
Now that you have an alternate Custom Type field, you can move on to hide the native Type field from your agents by clicking into the Field conditions app and in the Hide Ticket Fields section, check the box next to Type like this:

Now all you’ll need to do is test it out.
If you have any questions how to get this working on your account, contact us at support@sweethawk.co